After booting, the installation program begins by displaying a welcome message. Press [Enter] to begin the installation. If you wish to abort the installation process at this time, simply eject the boot diskette now and reboot your machine.
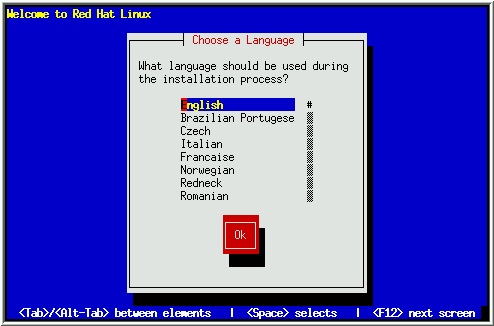
After the welcome dialog, the installation program asks you to select the
language to be used during the installation process (see Figure
6). Using the [\uparrow] and [\downarrow]
keys, select the appropriate language. Note the scroll bar to the right of
the languages -- it indicates that there are more entries than can be
displayed at one time. You'll be seeing scroll bars like this throughout
the installation program.

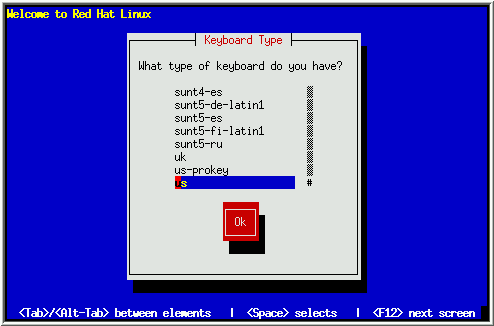
Next, the installation program gives you an opportunity to select a keyboard type (see Figure 7). You may navigate this dialog box the same way you did with the language selection dialog.
After selecting the appropriate keyboard type, press [Enter]; the keyboard type you select will be loaded automatically both for the remainder of the installation process and each time you boot your Red Hat Linux system. If you wish to change your keyboard type after you have booted your Red Hat Linux system, you may use the /usr/sbin/kbdconfig command.

Next, the installation program will probe your system to determine if your system requires PCMCIA (also known as PC Card) support. If a PCMCIA controller is found, you'll be asked if you require PCMCIA support during the installation. If you will be using a PCMCIA device during the installation (for example, you have a PCMCIA ethernet card and you'll be installing via NFS, or you have a PCMCIA SCSI card and will be installing from a SCSI CD), you should select Yes.
Please Note: This question applies only to PCMCIA support during the actual installation. Your installed Red Hat Linux system will still support PCMCIA, even if you say No here (assuming you installed the pcmcia-cs package).
If you require PCMCIA support, you will then be asked to insert the supplemental diskette -- Select OK when you've done so.
The installation program will then display a progress bar as the supplemental diskette is loaded.
Please Note: If you are performing an installation in expert mode, you will be asked whether PCMCIA support is required. As you might imagine, you must answer Yes if the installation requires access to a PCMCIA device.